
Self Tan Prep 101: Everything You Need for a Perfect Base
Self tanning has earned its place as a beauty essential, offering a good glow that never goes out of style. Plus, self tanning makes it easy to get that bronze without the sun damage. That said, using a self tanner for the first time can feel a little nerve-wracking. We've all seen fake tans go wrong—streaks, uneven patches, or that dreaded orange hue. The good news? Most of those issues come down to its preparation. With a few simple self tanning tips, getting an even, natural-looking tan at home is totally achievable, and way less stressful than you might think.
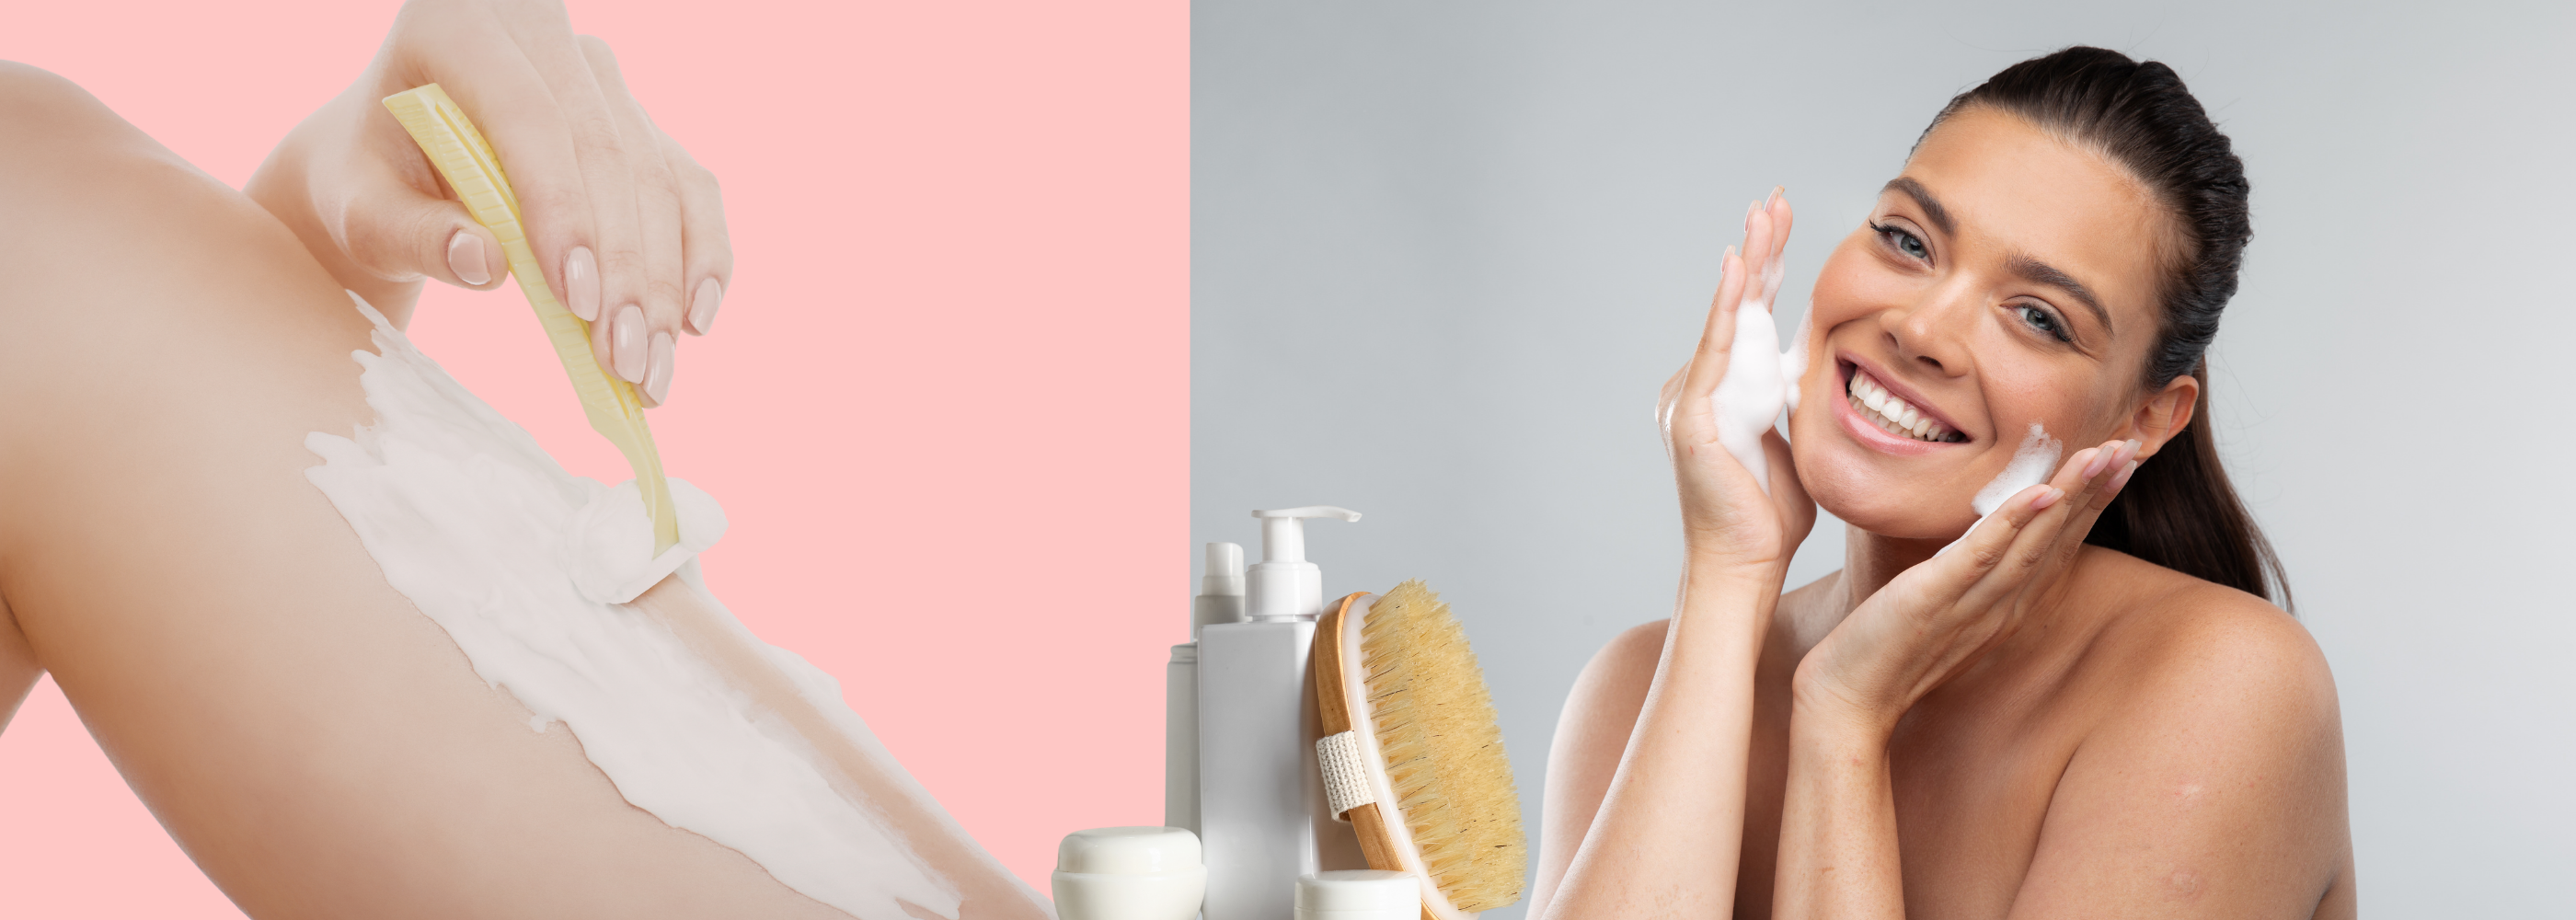
Step 1: Exfoliate First
A perfect self tan starts before the product ever touches your skin. Exfoliating might feel like an extra step, but it's the secret to a smooth, streak-free glow. It creates a smooth, even surface, allowing your self tanning product to apply more naturally, fade evenly, and last longer which is an essential for achieving the best self tan possible.
Use a gentle body scrub to remove dead skin cells and pay extra attention to areas where the product tends to cling. Once your skin is properly prepped, applying your tan with a self tanning mitt helps achieve an even and seamless coverage. This step may seem simple, but it makes a noticeable difference in achieving a professional looking glow at home.
Step 2: Shave Ahead for Best Results
A little planning goes a long way when it comes to shaving. To achieve the best self tanning results, shave the day before application so your skin has time to relax and pores can close properly. This helps prevent patchiness and uneven color. If waxing is your go-to, give your skin an extra day or two before tanning. Smooth, happy skin always equals a better tan.
Step 3: Moisturize with Care
This is one of those self tanning hacks that truly changes everything. Moisturizing before self tanning is important but only in the right places. Focus on dry areas like elbows, knees, ankles, hands, feet, and applying just a light layer to prevent the tan from grabbing too much.
Skip moisturizing your entire body right before tanning, as this can water down your glow. For the best self tan, hydration should be built up gradually. If your skin is on the drier side, start moisturing a few days beforehand with a sheer lotion that absorbs quickly and won't interfere with application.
Step 4: Pick the Right Self Tanner
The foundation of a flawless fake tanning routine starts with selecting the right formula and product. With a wide range of options, there's something for every comfort level and desired result. A gradual self tanning lotion is perfect for those who prefer a subtle, buildable tan and maximum control. It delivers a natural finish while keeping skin hydrated and smooth. If you're craving a deeper glow, a self tanning mousse provides instant results and effortless blending especially when paired with a mitt. For a personalized approach, self tan drops allow you to control your color by adding them to your favorite moisturizer.
Step 5: Have the Essentials on Hand
Before applying fake tan, ensure all essentials are easily accessible. This includes your best tanning mitt, your best tanning products, a dark and loose-fitting outfit for after application, and a towel to protect the floor. Once application begins, the last thing you want is to touch surfaces or scramble for items with your tan-covered hands.
Step 6: Self Tan Like a Pro
Start by applying your chosen self tanning product to your face with clean hands, before tackling your body. Use a self tanning mitt to glide the product in long, sweeping motions across your limbs, starting at the legs and moving upward, blending carefully around elbows, knees, and other joints. Apply a golf-ball-sized amount to each large area, and use any leftover product for hands and feet. If you're opting for self tanning spray, hold it a few inches from the skin and spray in vertical sweeps from bottom to top. Following these tips will give you one of the best tans, smooth, even, and effortlesly natural-looking.
Step 7: Let It Dry and Lock In
Patience is key when it comes to achieving a flawless self tanner finish. Every fake tan has its own development time, so always follow the instructions in the label. Most self-tanners take 4-8 hours to develop, though express formulas can be ready in just 2 hours. One of the biggest challenges is waiting for your tan to dry—that's where a tanning setting powder comes in. A top rated self tanning powder, like Tan Fan Self-Tan Drying Powder (B0GG8F1X19), it speeds up drying, leaves skin smooth and non-sticky, and helps extend the life of your tan. It's a simple yet effective addition to any self tanning tips routine for long-lasting, streak-free results.

Step 8: Rest Comfortably
After applying your false tan, the last thing you want is to worry about rubbing it off on your clothes or sheets. Loose, dark, breathable fabrics are your best friend—cotton, bamboo, or modal let your skin breathe and keep your tan even. For a worry-free night, a self tanning sheet protector like the Tan Fan Self Tan Sleep Sac Open Side (B0D142HW12) is a game-changer. Soft, lightweight, and designed to prevent tan transfer, it keeps your sheets safe while letting your tan set perfectly overnight. Finally, you can relax and wake up to a flawless glow without any stress.

A flawless self tan isn’t a matter of luck — it’s all about your preparation. Your base is perfectly set, so let the magic begin. Do the hard work once, and your glow will reward you.
Read more
Self Tanning Mistakes You’re Probably Making (and How to Avoid Them)
Thinking about a good self tan can instantly boost your confidence. Imagine having that golden glow without stepping outside and harming your skin. Unfortunately, there will be times that things wi...
Read more
How to Tan While You Sleep — And Actually Wake Up Golden
There’s nothing better than starting the day already glowing and a sun-kissed glow doesn’t have to come from the sun. With overnight self tanning, you can achieve a soft, golden finish without rush...
Read more